Three things to do before collecting sales tax on Amazon FBA
by November 1, 2024
FBA is a lucrative direction in which to take your e-commerce business. Let Amazon handle the fulfillment and customer service while you spend all your time on the fun stuff, like sourcing new products.
But selling on FBA isn’t all fun and sourcing. Amazon stores your products in Amazon Fulfillment Centers around the country, and this creates sales tax nexus in states where you may not have had it before. Long story short: selling on FBA takes a lot of the work out of selling online, but it also creates new burdens that online sellers may not be aware of.
Because of this, you must make sure you are setting up sales tax collection correctly in your Amazon seller account.If you aren’t, then you may find yourself on the hook for paying the sales tax you owed out of your own pocket. Before you even get started, make sure you’ve completed these three steps:
Step 1: Upgrade to a Professional Seller account
Individual Accounts cannot use the Amazon tax service. Follow these directions to upgrade:
- Login to your Seller Account.
- Under the Settings heading, click the “Account Info” link.
- On the Seller Account Information page, go to the Selling Plan section and click the “Modify Plan” button.
- On the next page, click the “Upgrade” button.
- Review the information on the next page and click the “Proceed to Upgrade” button to accept the terms and switch your plan.
After clicking the “Proceed to Upgrade” button, you will be returned to your Seller Account Information page and see a message indicating that the upgrade process has begun. Your subscription to the new selling plan will begin immediately, and additional links to Professional seller tools will appear on your Seller Account page. Some billing features may take up to 30 minutes to become effective. Once the upgrade process is completed you will no longer be charged the $0.99 closing fee on your orders. You will instead be charged a monthly subscription fee of $39.99 for your Professional selling plan.
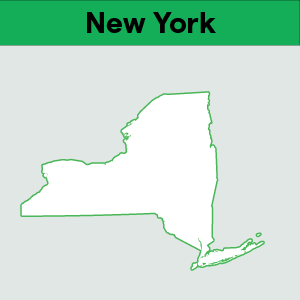
Step 2: Know the states in which you have nexus
Here’s a link to a page explaining which states Amazon FBA sellers have nexus in. Long story short, most states have – either explicitly or implied – stated that housing inventory gives you sales tax nexus in that state. This means you may have nexus in every state that has an Amazon Fulfillment Center and a sales tax.
Amazon provides a report telling you in which warehouses your inventory is housed. To access it:
1. Go to Seller Central
2. Click the Reports tab
3. Choose Fulfillment from the Dropdown Menu
4. Choose Inventory Event Detail from the sidebar
5. Click the download tab and choose your dates

Step 3: Register for a sales tax permit in each state where you have nexus
Once you have discovered where you have nexus, you must register for a sales tax permit in that state. Don’t worry, you can register for most sales tax permits online. Remember that most states consider it to be unlawful to collect sales tax without a license.
Once you’ve completed these three steps, you are ready to set up sales tax collection on FBA.
Ready to automate sales tax? Sign up for a free trial of TaxJar today.
It's time to solve your tax complexity
Talk to a TaxJar expert about automating your sales tax compliance.